

Domain from Namecheap + Linode
Buying a domain is easy.
What is more challenging is matching the domain to a specific hosting provider.
This blog article will explain how I bought my first rank and rent website's domain, 'drywallkingston.com.'
Good domain sellers
I first needed to identify a good domain name provider.
These were the first that came to mind:
I first wanted to buy my domain from domain.com because the prices were lower, but the website was not functioning correctly to process the payments.
I then searched for another domain seller and came across namecheap.com. The price for the same domain was more expensive than domain.com, but at that point, I had no choice.
Namecheap: Create Account
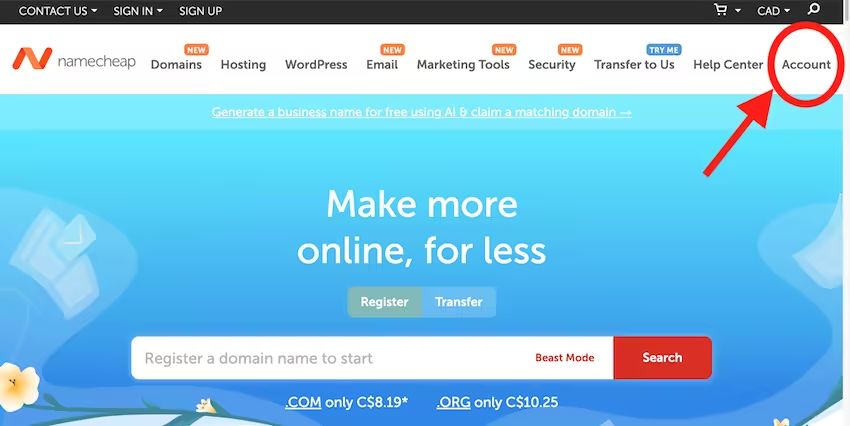
Go to namecheap.com
Click on 'Account' on the top right:
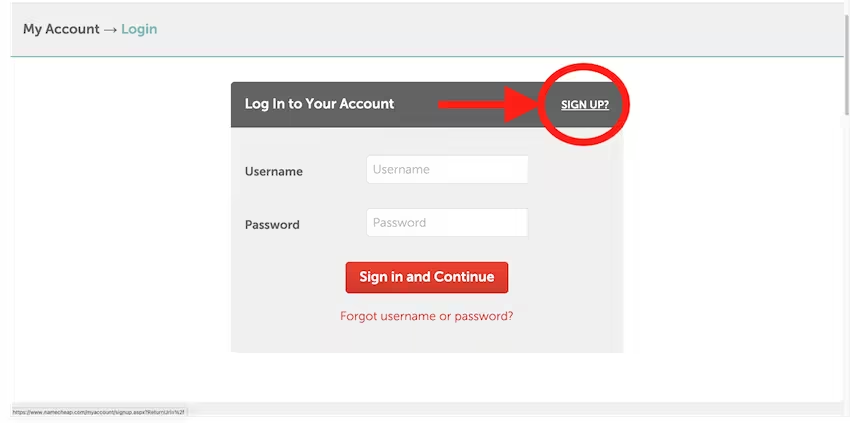
Then click 'Sign up.'
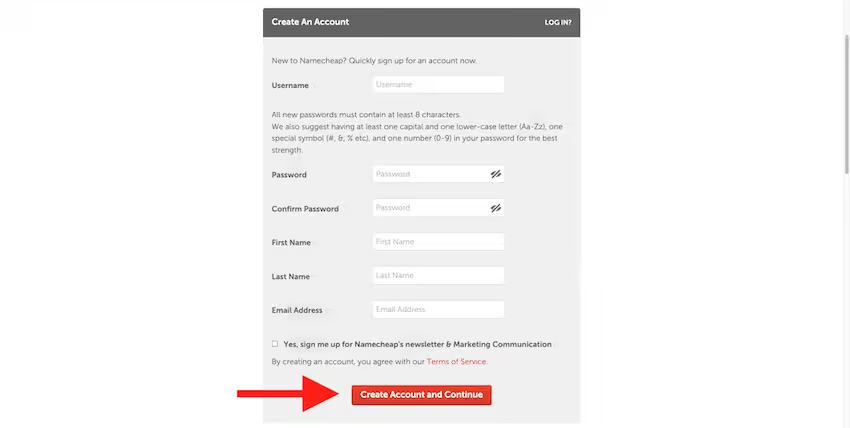
Fill in the form and then click 'Create account and continue.'
Once you have created your account, the next step is to verify your email. To do so, log in to your email provider's account and click the link Namecheap sent you. This will flag your account as « verified » on their end.
That way, you can log in and purchase a domain.
Namecheap: Selecting and Buying a Domain
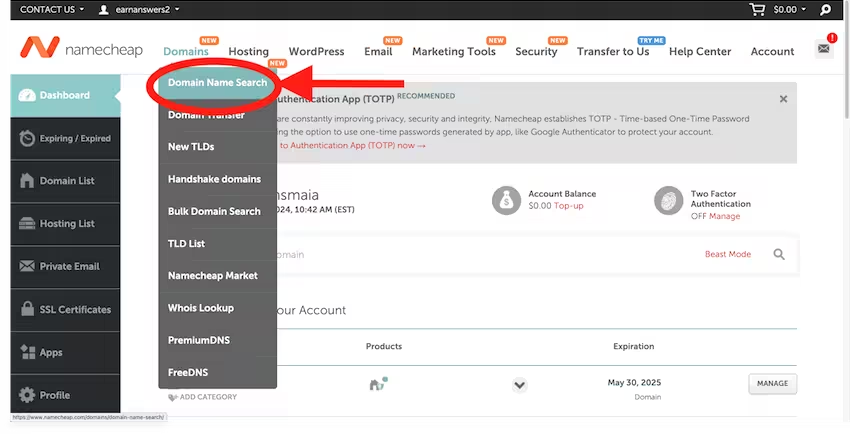
Once your account is created, log in and click 'domain name search.'
Enter the domain you want to buy in the search bar and click 'search.'
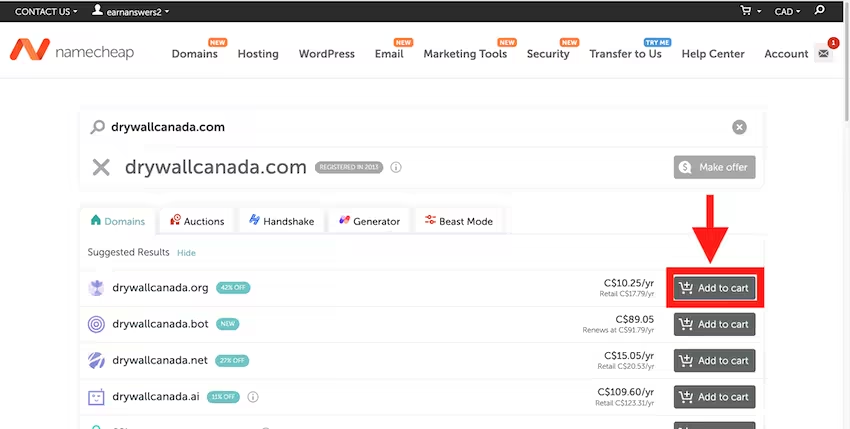
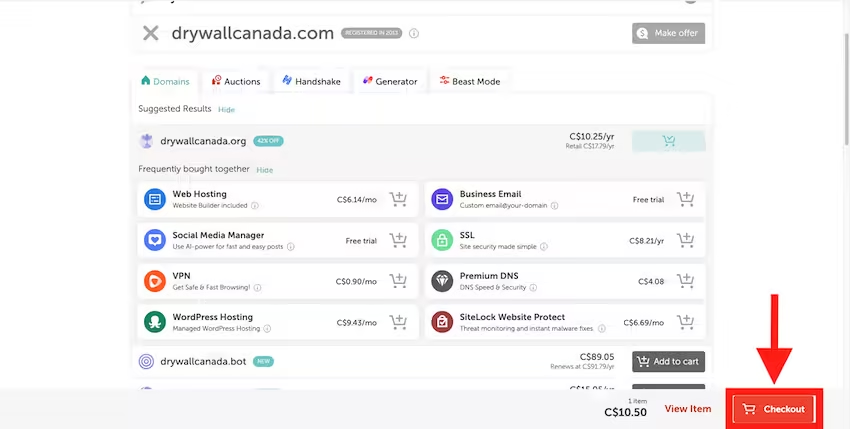
Place the domain you want to buy in your cart and checkout.
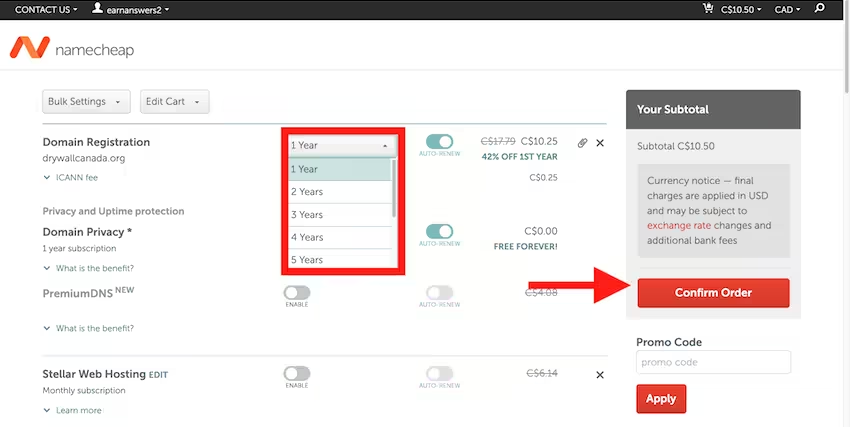
Click the drop-down menu and select how long the domain ownership will last.
Once done, click 'Confirm order.'
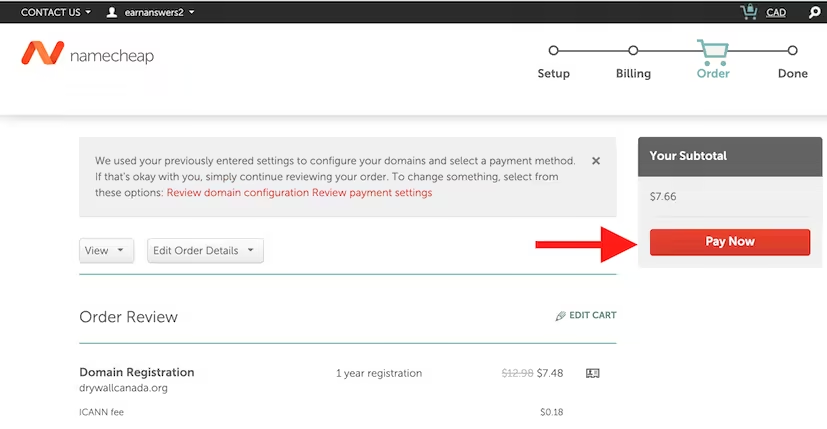
Then click 'Pay now.'
Now that you own the domain, you can associate it with your hosting provider. This will associate your domain name with specific hosting servers.
Namecheap: Managing the domain to associate with Linode hosting servers
My hosting provider is Linode. To connect the domain to the hosting provider, I need only specify the server names on the domain provider's website (e.g., namecheap.com).
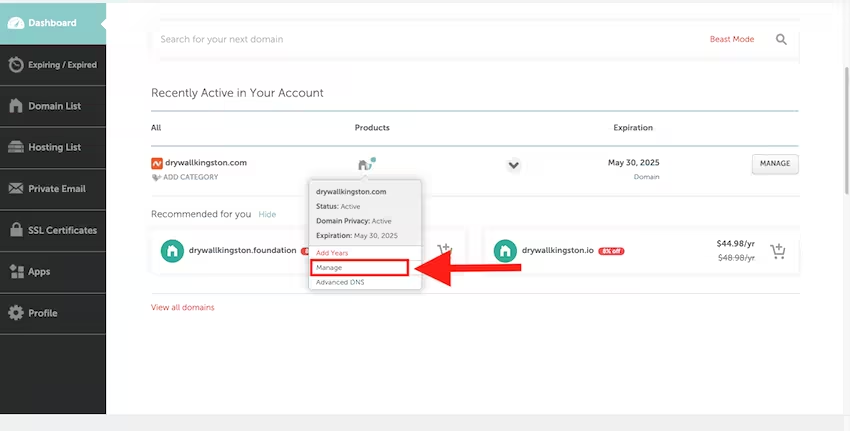
To do so, go to the Namecheap dashboard, hover on the home icon, and then click 'manage':
Under the 'nameservers' settings, click 'add nameserver' and add all the nameservers.
In my instance the nameservers are ns1.linode.com, ns2.linode.com, ns3.linode.com, ns4.linode.com, and ns5.linode.com

Once your domain is set, I can set up my NGINX web server hosted on Linode to run an Express instance and serve my rank and rent website. Read Rank and Rent Part 6 Transfer Domain Records from Namecheap to Linode, add Website on NGINX Web Server and Generate Letsencrypt SSL Certificate to learn more.